I. Introduction
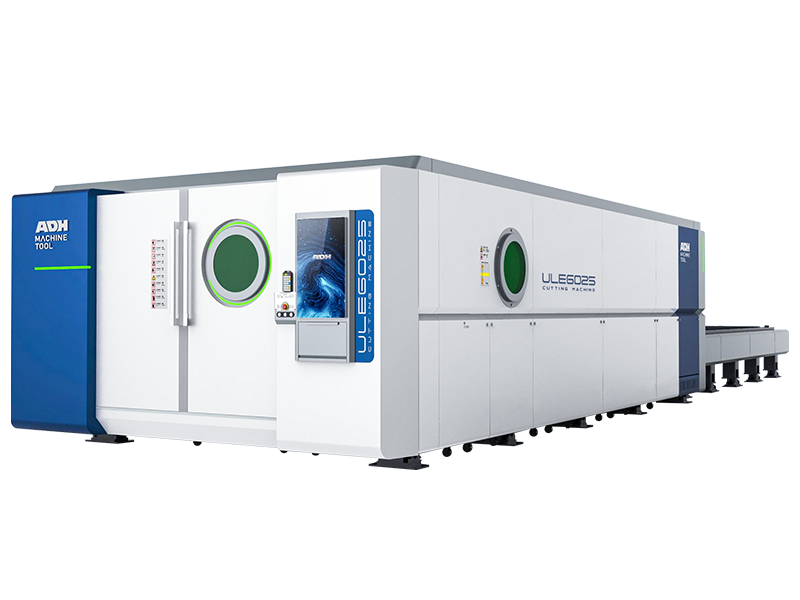
With the development of automation and intelligence in manufacturing, laser cutting machines are phrasing out traditional cutting methods with their edges on accuracy, efficiency, and flexibility. Thus, it becomes the top choice for metal and non-metal processing.
At present, laser cutters have been applied to multiple sectors, such as automobile vehicles, aerospace, electronics, semiconductors, and medical instruments, to produce high-precise components and productions.
According to statistics, the global market scale of cutting machines has reached 1 billion dollars with a growth rate of 20% annually.
Facing the rapid development and great potential of laser cutting technology, it’s critical for manufacturing companies and individuals to learn their working principles, feathers and applications.
Keep reading; let’s learn more.
II. Laser Cutting Machine Components
Laser source (CO2, fiber, etc.)
The laser source, as the core part of a laser cutting machine, generates a high-power laser beam. Normal types incorporate CO2 lasers, fiber lasers, and YAG lasers. CO2 lasers achieving 20% conversion efficiency have high output efficiency, so they are suitable for thick materials.
While fiber lasers have high photoelectric conversion efficiency, high-quality laser beams and low maintenance costs, so they have become the mainstream of the market.
Beam delivery system (mirrors and lenses)
The function of the beam and delivery system is to lead laser beams to the required directions. Focusing lenses focus laser beams into a small light spot with high power density to finish laser cutting.
The lens’s focal length is generally 5 inches, and the 7.5-inch lens is used for cutting materials thicker than 12mm. The light path needs protective gases to prevent the lens from pollution and a protective cover to prevent damage.
Cutting head and nozzle
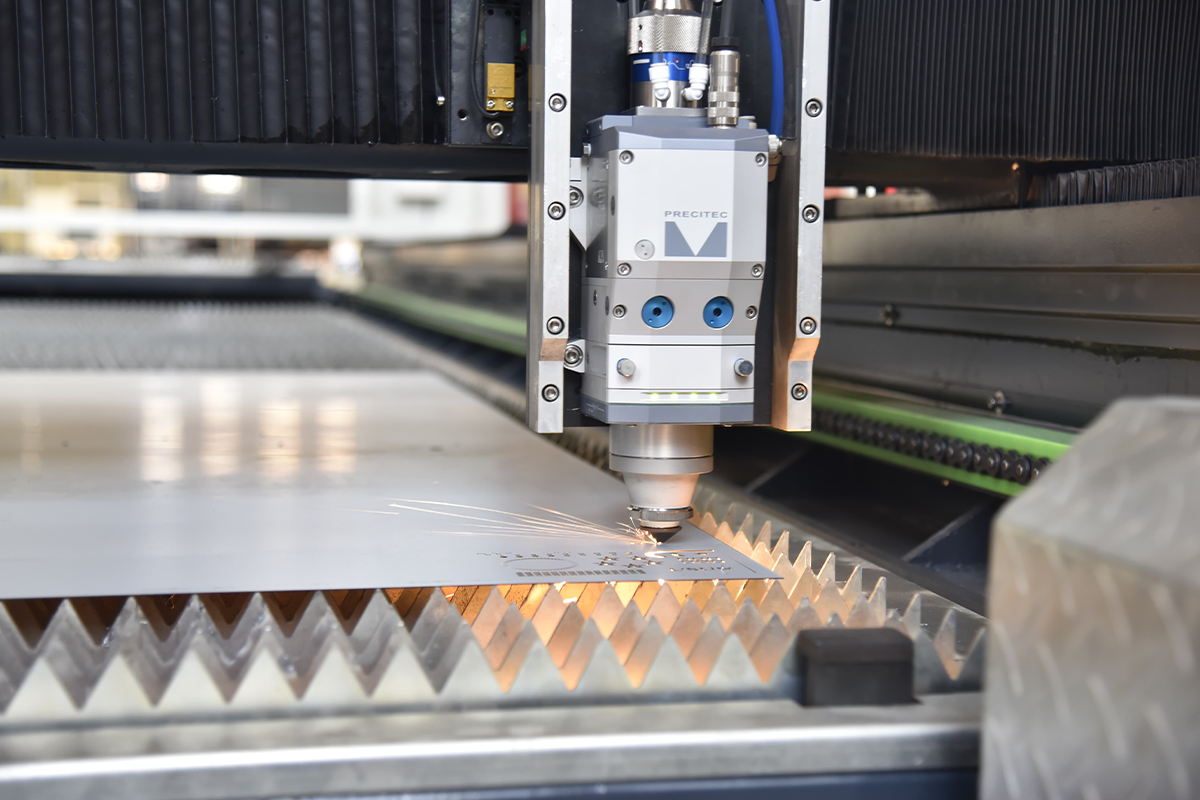
A cutting head includes a nizzle, focusing lenses, a following system and other components.
The shapes of the nozzles are divided into parallel, convergent, and conical, and their function is to lead auxiliary cutting gases.
The following system keeps the distance between the cutting head and the material surface constant and is divided into capacitive (non-contact) and inductive (contact) types.
The drive devices of the cutting head consist of a servo motor, lead screw, and other parts, driving the cutting head to move along the Z axis.
CNC control system
As the brain of a laser cutting machine, the CNC control system controls the cutting bed to move along the X, Y, and Z axes. At the same time, it controls laser cutters to output power, achieving accurate cutting pathes.
The quality of components decides the accuracy and stability of cutting. Common CNC control systems incorporate Beckhoff, PA, and Frank.
Cutting bed or table
A cutting bed or table is used to place materials to be cut, and it moves according to the CNC control system. Rigidity and stability influence cutting accuracy.
The structures of cutting beds include gantry, cantilever, beam, etc. There also have other special cutting machine types. For example, three-dimensional five-axis machines are special for vehicle industry.
Other parts
Besides, laser cutting machines are also equipped with other components that include a cooling system, gas supply device, air compressor, air drying filter, dust removal and exhaust system, slag discharge device and other auxiliary equipment as a way to keep the steady operation of the machine.
In this way, it’s obvious that a laser cutting machine is made up of highly precise instruments. Every part is integral to the whole machine, which places high requirements on the assembly process and manufacturing techniques.
III. Types of Laser Cutting Machines
CO2 laser cutters
Working principles: CO2 laser cutting machines utilize electric current to excite CO2, nitrogen, hydrogen, and helium to generate lasers with a wavelength of 10.6 microns.
Characteristics: CO2 laser cutting machines are among the most common and cost-effective cutting instruments, with power ranging from 25 to 100w.
Characteristics: CO2 laser cutting machines are among the most common and cost-effective cutting instruments, with power ranging from 25 to 100w.
Applicable materials: metal materials include non-ferrous metals, like thin aluminium plates. Non-metal materials include wood, paper, acrylic, leather, fabrics and wallpapers.
Application sectors: It has been widely applied in the cutting of non-metal materials and food processing, such as cheese and chestnut processing.
Fiber laser cutters
Working principle: fiber laser cutters utilize seed lasers and speciality optical fibers to generate high-density power laser beams with a wavelength of 1.064 microns.
Characteristics: fiber laser cutting machines belong to solid lasers so it’s unnecessary to maintain frequently. Its service life excessed 25000h. Its cutting efficiency is 3 times that of the CO2 laser cutting machine. Besides, the cutting heads of fiber laser cutters allow for continuous or pulsed light and perform well in adaptability.
Applicable materials: metals, alloy, non-metal(glass, wood and plastic). It’s suited for thin materials.
Application sectors: Metal marking, engraving, plastic marking and other fields. Relatively larger power of fibre lasers is applied wider.
Differences and specific applications
| Features | CO2 laser cutters | Fiber laser cutters |
| Applicable materials | non-metal materials: wood, acrylic, drapery | metal and non-metals |
| Efficiency | relatively lower | higher |
| Accuracy | general | higher |
| Maintenance | easy | easy |
| Cost-effectiveness | higher | higher |
| Market trends | generally replaced by fiber lasers | mainstream |
Overall, CO2 laser cutters with higher cost-effectiveness are mainly used to cut non-metals; fiber laser cutters with high adaptability and efficiency are easier to maintain.
When choosing laser cutting machines, you should take materials to be cut, efficiency, maintenance, and cost into account.
However, with perfect performance, fiber laser cutting machines are gradually replacing CO2 laser cutters to emerge as the mainstream in the market.
As technology develops and costs decrease, laser cutting machines will applied wider in the industry.
IV. How Laser Cutting Works: Step-by-Step
Laser generation
Lasers are the core components of laser cutting machines. They commonly contain CO2 lasers, fiber lasers and YAG lasers. Take the CO2 laser as an example.
They consist of a glass pipe filled with fixed gases like CO2, Nitrogen and helium. When high-pressure electric currents go through these gases, CO2 molecules will be inspired to reach a high energy level.
While CO2 molecules of a higher energy level return to a low energy level, Infrared light with a wavelength of 10.6μm will be released, which is a CO2 laser.
Beam focusing and direction
The laser beams generated by a laser are first reflected by a series of reflectors to change their irradiation directions. Then, focusing lenses focus the laser beams into a small light spot with a diameter of less than 0.3 mm.
Last, the focused laser beams of high power density can heat the material into melting or evaporating points rapidly.
Material melting, burning, or vaporizing
When irradiated by laser beams with a high power density, the energy-absorbing materials will reach a high temperature.
However, different materials respond differently to lasers, so they need different laser powers, generally ranging from 1-6kw.
When the temperature exceeds its melting point, the materials start melting; when it exceeds the boiling point, they start evaporating and forming steam. Melted and vaporized material will be removed from cutting silts, forming notches.
Assist gas for material removal
To speed up the removal of melted and vaporized materials, laser cuttersinject high-pressure gas, such as oxygen and nitrogen, while cutting. The gases can blow the melt out of the silts to prevent noches from re-welding and protect the focusing lenses from damage.
As for some oxygen-active materials, such as stainless, inert gases, such as nitrogen, are usually adopted to prevent notches from oxidizing.
CNC control for precise cutting paths
Under the control of CNC control system, the cutting head moves percisely according to pre-programmed cutting pathes.
Modern positioning accuracy of laser cutting machine have reach 0.052mm. Thus, they are capable of cutting complicated and precise patterns.
In addition, CNC control systems can also adjust parameters like laser powers, cutting speed and gas flow to achieve full-automation operation, which greatly improves productivity.
V. Advantages of Laser Cutting
High precision and accuracy
Due to the small diameters of a laser beam, it can cut out precisely pattern. The diameters of focused light spots are less than 0.33mm.
Adopting contactless processing means that laser cutting doesn’t require wearing cutting tools. Thus, the cutting accuracy will not decrease because of the extended cutting periods.
Integrated with a CNC control system, laser cutters can be operated automatically. The positioning accuracy can reach 0.05mm, far less than traditional mechanical processing.
Narrow heat-affected areas indicate that the materials around cutting silts are barely affected. Therefore, small deformation of the workpiece ensures size accuracy.
Versatility in cutting various materials
Laser cutters allow for cutting multiple materials, including metals, non-metals, and various composite materials.
Due to different materials' absorptivity, cutting parameters should be adjusted accordingly. However, you should be aware that only the output parameters should be adjusted without changing cutting tools.
Three-dimensional laser cutting machines can cut on any surface without artificial angle adjustment, which widens the range of applicable materials.
Reduced material waste and clean cuts
Thanks to high quality and flexibility, laser cutting can reduce waste as much as possible and produce clean cuts.
It has narrow cuts, ranging from 0.1-0.3mm, resulting in high utilization rates. Integrated with a CNC control system, it allows automatic typesetting to reduce waste.
High-pressure gases are injected while cutting to blow the melt out so that it will not stick to the cuts. Therefore, the surfaces of the cuts are smooth and clean.
Inert gas can be used to protect easily oxidized materials, like stainless steel, to prevent the cuts from discoloration caused by oxidization.
Faster production times
With their fast cutting speed and high efficiency, laser cutters can greatly shorten production times. The speed of a laser cutter can reach several meters per minute, which is several times that of traditional cutting methods.
Without installing and clamping the workpiece, a laser cutter is free from loading and unloading materials to save time. Assisted by an automatic loading and unloading system, laser cutters possess higher efficiency.
Laser cutters allow for one-time moulding without twice processing, saving time for subsequent processing.
Automation and repeatability
Laser cutters can be easily automated and standardized, so they are suited for batch production.
Most modern laser cutting machines equipped with CNC control systems can operate automatically, decreasing labour costs.
CNC control systems storing cutting programmes can achieve quick calls and ensure the repeatability and consistency of processing
Low maintenance means that there is no additional labour demand, because you only need to change the cooling water and maintain optical systems regularly.
General speaking, laser cutting machine feathering high accuracy, efficiency and fexibility and low costs are favored by the manufacturing, promoting the intelligent and green development of fabrication industry.
VI. Applications of Laser Cutting
Automotive industry
Cutting of auto body parts: laser cutters can rapidly and precisely cut body panels such as doors, hooks and trunk lids. It produces high-quality cuts and causes small deformation.
Cutting of interior decors: most interior decors, including instrument panels, centre control panels, and seat frames, are produced by laser cutting machines, which are capable of producing complicated and precise patterns.
Aerospace and defense
Cutting of aeroplane skin: Lasers can precisely and efficiently cut aeroplane skins, especially those with intricate curves and special-shaped holes.
Cutting military products: they can produce the core components of military products, including firearms parts, ammunition, armoured vehicles and warships.
Electronics and semiconductors
Cutting of semiconductor chips: Laser cutters can be used during semiconductor packaging of cutting wafers and separating chips with little damage and fast speed.
Cutting of electronic components: they can process ceramics and plastic substrates of electronic components, such as resistors, capacitors, and connectors.
Medical devices
Cutting of medical devices: scalpel, orthopaedic saw, medical scissors and other instruments can be produced by a laser cutter, which ensures the tartness and smoothness of the cutting edge.
Cutting of medical implants: artificial joints, bone fixed frames and other implants are usually made from hard processed materials, like titanium, so laser cutting is an intelligent way for moulding.
VII. Conclusion
In the whole article, I explained the definition, working principles, types, applications and advantages o laser cutting machines which provides you with a thorough guide for the machine.
As one of China's biggest exporters, our company boasts 4 decades of laser cutting machine R&D history. Our laser cutters with excellent performance are a wise choice for you. If you are interested in our products, you can browse our product page. Welcome to contact us.
VIII. Frequently Asked Questions (FAQs)
What factors affect the speed and quality of laser cutting?
Here are five elements that might affect the speed and quality of laser cutting:
Laser power: the higher the power of a laser cutter, the faster the cutting is. High power laser cutting can evaporate materials rapidly so as to minimize heat-affected areas and produce more smooth cuts.
Focused location: the relative position between focused points and the workpiece surface matters. As the focused points in the right place, the cutting silts are narrower in high efficiency resulting in better cutting performance.
Cutting speed: the cutting speed is directly proportional to the power density, which means that higher power density can improve cutting speed. However, cutting speed is inversely proportional to the density and thickness of the materials.
The pressure of assist gases: assist gases are needed in laser cutting, and the pressure of gases is an important factor. The assist gases spray with a laser beam on the same axis to protect lenses from polluting and blow the melted slag out.
Material features: different materials respond differently in terms of absorptivity. For thin and soft materials like paper and plastics, low power cutting prevents materials from melting and burning;for thick materials like metals, high power with low speed cutting produces clean cuts.
How does assist gas enhance the laser cutting process?
Blow the melt and scrap: assist gas blows the melting materials and scraps out from cutting areas to smooth the cutting process and prevent re-solidification that may clog cutting silts.
Prevent oxidization: Inert gases like nitrogen can prevent materials from oxidizing during cutting. For example, nitrogen produces clean and oxidization-free cuts to promote high-quality cutting edge.
Cooling: the contrasted air is usually used to cut non-metals like wood, plastics, and acrylic to cool materials and clean scraps from cutting areas.
How much do laser cutting machines typically cost?
The price of a laser cutting machine ranges wildly, from a few thousand dollars to millions of dollars.
Entry-level small-size laser cutters cost about 4000 to 15000, suitable for small batch production or green hands.
Laser cutters for industrial using usually cost 20000 to 45000 dollars, suitable for mass production and precise processing.
Generally speaking, when purchasing laser cutting machines, many factors, such as laser power, sizes, and configurations, are based on real demands and budgets so as to choose the machine with the best price performance.